Logans Leisure #2: End Table Subwoofer
My blog is called "learnings, lessons and leisure". The learnings and lessons are similar, and while I will post things under each title, the differences are pretty minimal when it comes down to it. The leisure posts though, they're reserved for things that are about what I'm doing with my life. I have found that I need to constantly have a project, or something that I'm thinking about, working on, designing, fixing or I get antsy. And these projects that I find myself working on might be of interest to some people.So, this is my second "leisure" post, but it is likely more "leisure" like than my first (a review of a broadcasting software). Hopefully some of you out there find this project as entertaining as I did :).
Why build a custom subwoofer?
Like I've mentioned before, one of my lifelong goals is to become a renaissance man. As part of that goal, I have been selecting a new area to develop my skills in each year or so. Its nothing completely structured, but its enough of a loose idea that it keeps things going. The best way to do this, is to try to tie those new skills into something that I already like. The project this time, was then mixing my interests in home theater, and my desire to get better at woodworking.
For this project, I designed and built a custom subwoofer. Some might (and have) asked "why build a subwoofer". There are many answers to that question. Simply because I can is one. Just like other things you do yourself, you can get much more value than if you buy "store bought". Another reason is because I want to learn from the experience. But the primary reason for it was for functional reasons.
What do I mean when I say I built it for "functional" reasons? Speakers for all intents and purposes are simply air pumps. Just like other instruments that reproduce sound, larger is always better for low frequencies. So for a subwoofer, extra cabinet volume is always better. The problem with a really large subwoofer is simple. They are just large, and hard to fit anywhere without being overly intrusive. If I had a dedicated sound room, I might be able to get away with building some really crazy huge subwoofer. However, the current "home theater" is actually just the front room in our apartment. While my wife is amazing and puts up with me and all of my crazy hobbies and interests, I didn't want to even try to force a large black subwoofer into our front room décor. I didn't want to miss out on my chance for amazing bass in movies though.
The solution for me was to hide the subwoofer in plain site. Instead of making the subwoofer a featureless black box that sits in the corner, I decided to disguise it as an end table. So this post is of my design and construction of this end table subwoofer. I understand that it is still a very large subwoofer, and that it won't work for everyone, it DOES work quite well for me. It fits in the space between the two couches perfectly, and uses what would most likely be wasted space. If the design works for you, go for it, and build it. I'd love to see variations and adaptations by others. Although if you do use my design, just give me credit somewhere, and post links to your builds here.
Believe it or not, I didn't start out knowing much about subwoofers (other than that I liked them, and that you could have a ported, or sealed one). I had to do my homework to learn enough to build one. While I am still no "expert", I will try to explain some of what I learned as I went. So if you'd care to learn some REALLY dumbed down basics about subwoofers, then read through this next portion. If not, just go look at the pretty pictures at the end.
Designing a custom subwoofer
First, you need to decide what type of subwoofer you want to build. If you are building a home theater (primarily movies) subwoofer, a ported subwoofer is generally a good choice. This is because ported subwoofers keep a relatively flat response curve over their frequency range, and then drop off sharply at the end. The main potential downside to ported subwoofers is port noise (the subwoofer is literally ported and tuned like an organ, and so it has air coming in and out of the enclosure). Sealed subwoofers are just that, sealed, as in no openings at all. These of course do not have port noise, and are there frequently smaller. Their frequency response curves however are very different (think more like a bell shaped curve).
Generally you get more extension out of a ported subwoofer (plays lower notes), as well as more SPL (sound pressure level... aka, volume). Since extension is what I was after, this is what I designed.
The main components
There are really just three main components to a subwoofer. The driver (the actual subwoofer "speaker"), the amplifier, and the enclosure (the "box"). When designing a sub, you need to account for each component and how they interact. That's what makes designing the subwoofer take so long, as each variable affects the others.
Usually, you start with some sort of design constraint, and work from there. Maybe its either the box has to be a certain size, or has to fit within a certain budget. Whatever it is, its the easiest to start with the constraint, and work backwards from there.
My constraint was size. The whole point of this project was to allow me to build my woodworking skills, and have an impressive subwoofer that is hidden in plain sight. Because I knew the size between the couches, and the desired height, it was pretty easy to determine what the final overall
dimensions would be.
The space between the couches is 37x37in, and 29in tall. I didn't want to completely fill the area between the couches (which would make it look enormous), and I DID want it to fit through doors,
I ended up going with 32x36in and 27in tall. Because my design required some extra space to make it look normal (end tables usually have roughly an inch of overhang from the top to the sides).
Then my design and materials required further shrinking the actual subwoofer enclosure.
I used a free program called "winISD" to design my subwoofer. WinISD does all the scary math, and other than being a bit complex at first, it is relatively easy to use. While there are other programs out there, this is the one I used exclusively to design my subwoofer. I have written a quick guide on how to use WinISD that you can read HERE if you're interested in the specifics of both how to use the software, and the physical attributes that it is modeling.
When you look at subwoofer specifications (and actually, speaker specs in general), you'll see something called the -3db limit. That is the point when the flat graph, starts dipping from the flat part by 3db. The reason this is important, is this is the frequency that for all intents and purposes is the "end" of its frequency response range. Sure a speaker might technically produce sound at frequencies far below the -3db point, but it will be so much quieter than the frequencies above there that you might not even be able to tell that it is playing. So for a subwoofer, you want this -3db point to be as low as possible within your constraints.
Oh, also. It might be easy to look at a speaker and be like "oh hey, I just read on the internet that the -3db limit for these speakers is 80hz. That subwoofer only plays to 20hz, this speaker here plays from 80hz to 25000hz, so I won't notice those few measly little 60hz at the bottom, and I'll do just fine without a subwoofer".
The reality of the situation is that when you halve a frequency (in hz), you just dropped an octave from the previous frequency. That means that a 20hz subwoofer would gain you exactly two octaves of range below that of the speakers mentioned above (that bottomed out at 80hz). Most TV's, soundbars, and satellite speakers have small drivers in them (2-3 inches or less is pretty common). Their -3db points are frequently in the 110-150hz range. So that means that you're missing out on 3 octaves (140 > 70 > 35 > 17.25). If that doesn't sound like a lot, go find the nearest piano, and then pick a note, and then go 36 keys to the left (including the "black" keys). That is almost half of the keyboard. And to me, its kind of a big deal to be missing all of that extra sound. If it isn't to you, then that's fine, its just once you've heard it, its hard to go back :P.
Choosing the driver
Its best to start out selecting a few drivers to consider, as each driver has different specifications, and behave differently in different enclosures.
For what its worth, I chose the Stereo Integrity D2 15in Subwoofer. They recently lowered their already competitive prices (sadly, the week after I ordered, but such is life), and offer some great value in the subwoofer market. I seriously considered a few drivers from Dayton Audio (the parts-express house brand). But I ended up choosing the Stereo Integrity because it had more travel, worked with my enclosure size, and with the default settings of my amp.
Here is the Stereo Integrity driver next to one of my laptops. You can see that a 15in sub driver is no small object. This one happens to weigh 35lbs or so.

Choosing the amplifier
I chose to go the easy route on the amplifier on the sub. I went with what is called a "plate" amplifier for the sub. This means that the amplifier is "contained" in the subwoofer, and is not a separate unit like you might find being used for other speakers (the receiver most people have in their home theater also functions as an amplifier for the speakers).
Most subwoofers that you buy commercially are powered subwoofers (which usually means that they have a plate amp). I decided to go with the same method.
I purchased the BASH 300w plate amplifier.
Additionally, the BASH had some built in features that ended up being useful with my design. The most important being the High Pass filter that it came with. A high pass filter lets frequencies higher than the filter "pass through" to the driver that is being powered.
"Why would you want that" you say, "isn't low frequency what you're building this subwoofer for?" That's a valid question actually. But it does have a simple answer. If you send full, unfiltered audio to the subwoofer, it will try to play ALL of it, including the frequencies that it cannot play. In trying to play those "too low" frequencies, the subwoofer driver could damage itself. So to prevent the subwoofer from "blowing out" while watching something amazing, I found an amplifier with a built in HPF.
Designing the subwoofer enclosure
For a relatively novice woodworker, the hardest part of the project, was taking those specifications that I created in WinISD, and turning them into an actual design that could be built.
The hardest part isn't knowing what dimensions that you want, but how to determine in what order things are assembled to get those dimensions. I found it quite handy to draw things out, just to
make sure that I wasn't making any mistakes in my design.

The next thing that took a bit of time, was the fact that while on paper you can design just about anything that you want, putting it together is different. Think about where you are going to be
having any exposed fasteners. Of course exposed fasteners are not a bad thing, but depending on your final design, it will affect how you construct things. I chose to cover the corners with molding, and fasten the molding to the box by screwing from the inside. This left the finished product with no visible fasteners.
After you know what the thing is going to look like, you have to turn it into something you can build. This means making a cutlist, and a cut sheet. These are mine. Keep in mind that I have terribad handwriting.
And when looking at the cutlists, you'll notice that there are more pieces than you need for the subwoofer. This is because I decided to build an end table that matches the sub at the same time. These will turn into "bookends" for the couch, so I thought it would be better if they matched.
These are the pieces that were to be cut from Cherry.

And here are the two sheets of walnut. I apologize if its a bit hard to read, but I wasn't about to make this all digital. Instead, you get it how I did it :).

Feel free to use the cutsheets if you'd like. I don't claim that they are free of errors, although I did try to correct the problems that I made.
Building the subwoofer
The first part is simple in concept, but has a big impact on the rest of the project. That is of course cutting out the wood. This is best done on a large table saw with a sharp blade. Take your time in cutting, making sure that you keep all your fingers. I scored in this department, as I had a friend with access to a cabinet making shop and lots more experience than I have with cutting large sheets of wood.
After you cut the pieces, mark the pieces of wood according to the naming convention that you've chosen. And do yourself a favor, and remember to mark the pieces of wood on the correct side. Depending on how you want to finish your sub, you will either want to do the finishing before or after the construction. Because my subwoofer is designed as an end table, and has two colors on it, I had to stain the pieces that were different colors separately before it was assembled.
I used a relatively unique method for making the wood black. Its called ebonizing. It is a process that uses the tannins present in the wood, and the some iron that has been dissolved to create a chemical reaction that turns the wood black. The process works better with woods that are high in tannins naturally. This is why I am using Walnut.
The process actually works very quickly. This photo shows some of the pieces I was working on in the various stages of reacting to the "stain". Believe it or not, the pieces were done in order, from bottom right to top left. The pieces all react differently, but somehow all end up roughly the same.
.jpg)
And some more comparisons. The unstained wood is the natural walnut, and the ebonized walnut is on either side. You can see that the dried ebonized wood is a bit more charcoal grey looking than it is black. However, unlike painting the wood, there is BEAUTIFUL grain there.

Its actually extremely hard to get a good photo of the ebonized wood after the polyurethane. Here are some attempts though. This first one is a bit oversaturated.

This one is a bit washed out on the other hand.
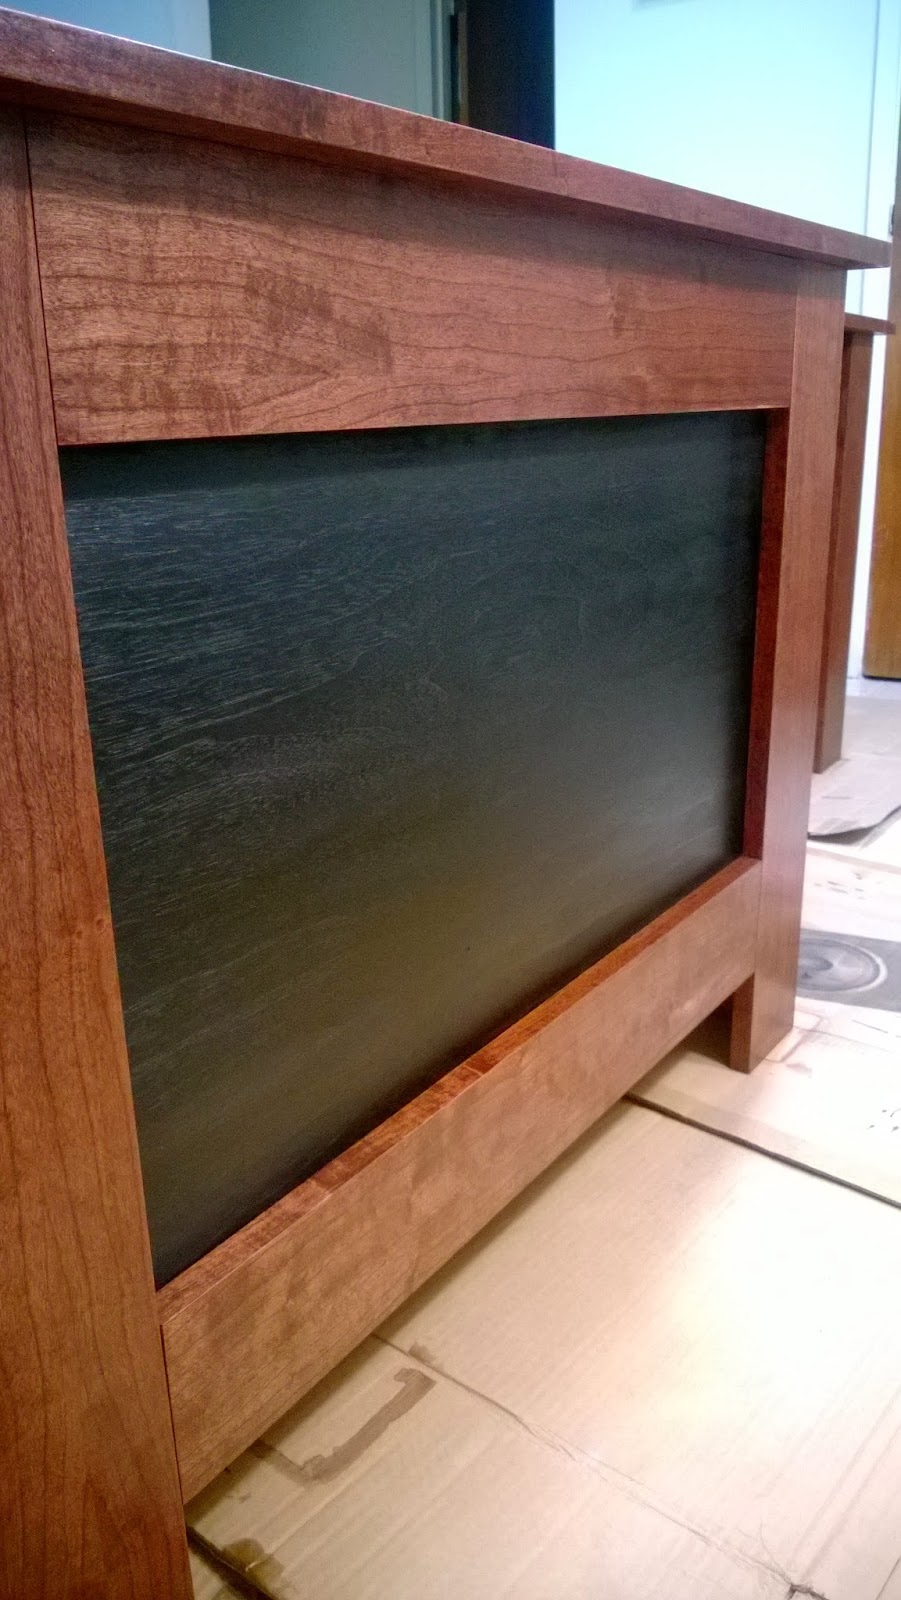
The Cherry was stained a 50/50 combination of red mahogany and red oak. It was super simple. Wipe on, wipe off, easy peasy. It was stained to match the front channel speakers. Here you can see the molding, legs, and top.
This shot is from after the staining, but before the polyurethane. You can see the tops of both the sub, and the end table, as well as all of the legs and the molding pieces.

The construction
I just followed my designs to a "T". There were a few places where my designs were off, and things needed to be improvised in order to salvage the operation. My father was there helping me assemble things and is an experienced woodworker. He mentioned that the difference between good woodworkers and novice woodworkers is often simply how well they hide mistakes. Luckily, most of my mistakes were non-visible, and only required a small amount of scrap wood to fix.
I used wood glue, and screws to build my project. The screws were mainly there for securing the wood while the glue dries, but they do add a non-zero amount of strength as well. I used 1 1/4in coarse drywall screws for securing most pieces together, with 2in coarse drywall screws for the sections where I screwed into the endgrain of another piece. These endgrain sections were predrilled to ensure the wood didn't split.
Photos of the construction process
The main box constructed, with the cutout for the amp done, and the port halfway constructed.

A terrible photo of the half way point in the project. Sadly, its the only photo of it in progress from the outside. You can see the molding done on the ends, and the top and legs were on. As a side note, you can see that the subwoofer is placed up off the ground. This is because my subwoofer is a down firing sub with bottom facing ports. The sub needs to be up off the ground to let the driver breath. Also, no tables I've ever seen have rested on the ground. Keeping the sub off the ground is a win win win in this situation.

Here is something that I have been frequently asked about. The interior bracing, and the port. You can see the port here runs along the side of the enclosure, and that it was longer than the height of the sub, and so it just turned and went around the top.
You also see the interior bracing in this shot. The general rule of thumb is that you want to have no more than a foot of space on the interior of the box that is not braced. I have a few spaces that are longer than that, but not by much. There are two braces in each direction. The top of the subwoofer is also double thick, as are each of the edges of the enclosure which helps reduce resonance. The braces here are glued, and screwed into the inside, and where possible, they are also screwed and glued to each other.

The other thing this shows is the fact that I basically constructed the whole subwoofer upside down. This is how all the screws are hidden, as everything is attached from the inside. After this point, all I had to do was attach the bottom, install the amp, and flip it over.
Like this for instance.
.jpg)
Finished product and Testing
So how does the subwoofer do when I compare it to what I thought it would be like?
I was looking for three main things with this project.
- Disguising a high performance subwoofer to blend into the surroundings.
- Developing my skills with project design and woodworking
- Getting more performance per $$ than I could with anything premade
Can it hide in plane site? Here is what it looks like in place in the corner.

A close up of the end table.

A shot of the whole room to wrap it all up.
.jpg)
Check, we've got the first point covered.
Did I learn a lot about woodworking and have the chance to practice some skills? Yes, for sure. So another success. TWO FOR TWO!
And finally about value. How does my sub compare to things you can find "in the wild" from normal subwoofer manufacturers?
The closest subwoofer that I could find in terms of output and extension, is the HSU Research VTF-15H. It reaches to 16hz, and its max output is about 120db. My sub hits 16hz, and is flat at about 116db for most of its range. The HSU retails for $880-999. The components for mine cost $690 (and I got a "free" end table that matches).
However, if you were to build this yourself, you could VERY easily save 100-200 dollars. The subwoofer driver has been reduced in price by $50. Also, I happened to build my subwoofer out of possibly the most expensive plywood available. I had it custom ordered from a cabinet shop for me, and each sheet of ply cost ~$100. If you were to do this project out of normal old 3/4in oak, you would have saved ~$120-150. So the value is definitely there.
Conclusion
So far, I've been extremely pleased with the sub. It plays cleanly, and quite deep and loud (when needed). Its perfectly unobtrusive, and hides quite well in plane sight.
I know I overbuilt the subwoofer (particularly for this 900 sq/ft apt), but I didn't want to build a subwoofer that would need to be replaced as soon as it was put into a larger room in a future home. The subwoofer is capable of completely drowning out the rest of my theater system, however, when it is adjusted correctly, it blends in quite seamlessly. I run it at approximately 1.5/8 power in my setup (the amp goes "up" to 8, not 10 for some reason). I've demoed a few clips at up to 1/2 power, and at that amount of power, the lamp on the sub actually jumped far enough for me to see under it, so it does have enough output to spare to allow it to grow.
At certain frequencies there is a small amount of localization, but that is due more to the placement in the room than the subwoofer.
All said, I would say that the project wasn't actually very difficult. All it took was some time spent researching, and then designing something that worked. I'd highly suggest to anyone reading here to give it a good hard consideration if you are anywhere even remotely interested.
Plus, the look on peoples faces when you tell them that that "table" is the subwoofer that just surprised them is quite priceless :).